Simple Tricks to Make Your Google Slides Stand Out
Want to create presentations that capture your audience’s attention? Adding simple animations and transitions can transform boring slides into engaging experiences that keep viewers interested.
Instead of static slides that put people to sleep, you can create dynamic presentations where text appears at just the right moment, images smoothly fade in to emphasize key points, and each slide flows seamlessly into the next.
These visual enhancements don’t just make your presentation look more professional, they actually help your audience follow along and remember your message better.
The best part is that you don’t need to be a design expert to make this happen. Google Slides makes it incredibly easy to add these engaging elements with just a few clicks.
Whether you want bullet points to appear one by one to build suspense, images to fly in from the side to grab attention, or slides to fade smoothly from one to the next, you can achieve all of this without any technical skills.
With the right balance of subtle animations and smooth transitions, you’ll transform your presentations from forgettable slide shows into memorable experiences that keep your audience engaged from start to finish.
What’s the Difference Between Animations and Transitions?
Transitions control how you move from one slide to the next. Instead of just jumping to the next slide, you can add smooth effects like fading or sliding.
Animations make individual elements on your slide move or appear. You can make text boxes fade in, images fly across the screen, or bullet points appear one by one.
Making Text and Images Move (Object Animations)
Step 1: Choose What to Animate
- Open your presentation in Google Slides
- Click on any text box, image, or shape you want to animate
Step 2: Add the Animation
1. Look for the Insert menu and click Animation
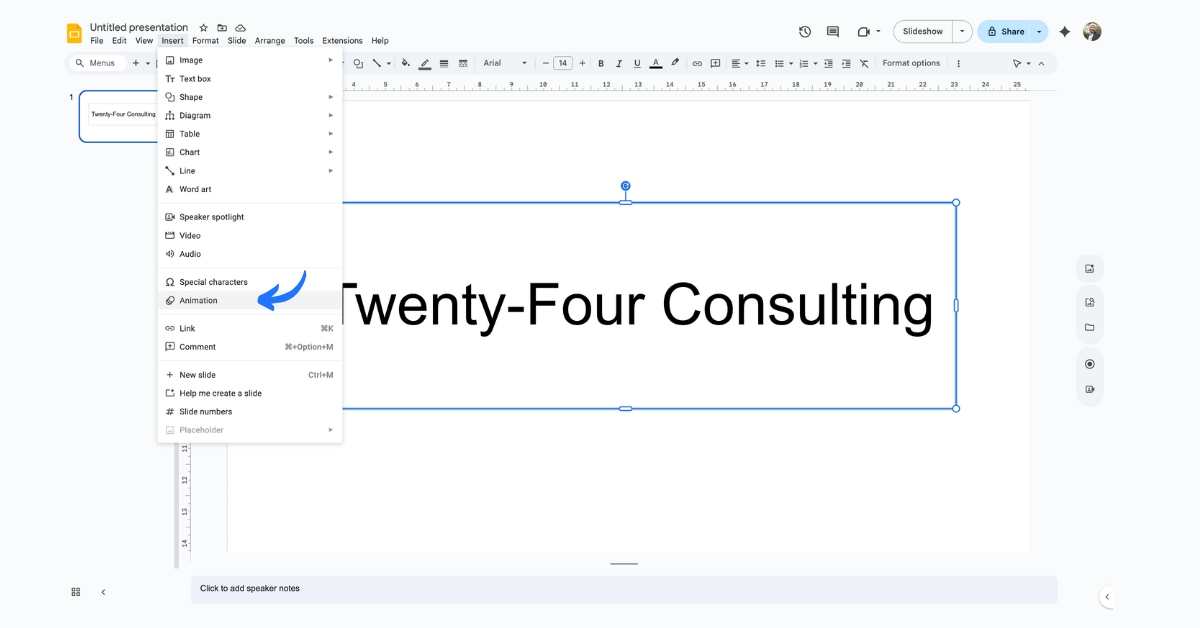
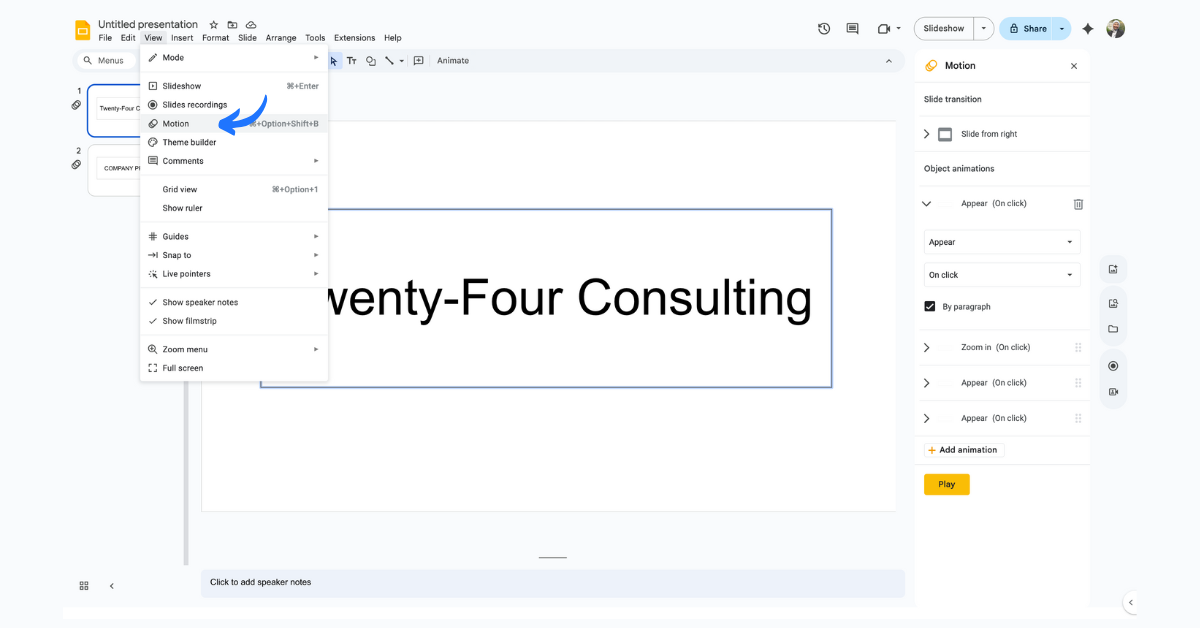
2. Alternative: Click View then Motion (both do the same thing)
Step 3: Pick Your Animation Style
-
A panel will appear on the right side of your screen
- Under “Object Animations,” you’ll see different animation options
- Click on any animation to apply it to your selected item
Step 4: Customize How It Works
Timing Options:
- Your animation will automatically be set to “Appear (On click)” – this means it happens when you click during your presentation
- Want it to happen automatically? Use the dropdown menu to change when it starts
Speed Control:
- See the slider? Drag it left to make animations slower, right to make them faster
- Test different speeds to find what looks best
Special Feature for Lists:
- Have a bulleted list? Check the “By paragraph” box
- This makes each bullet point appear one at a time instead of all at once
Test Your Work
Click the Play button to see how your animation looks before presenting.
Important Note: Some web browsers might not display all animations perfectly, so test your presentation beforehand.
Adding Smooth Slide Transitions
Want your slides to flow smoothly from one to the next? Here’s how:
Step 1: Pick Your Slide
- Open your presentation in Google Slides
- On the left sidebar, click the slide that you want to transition TO (the slide that will appear next)
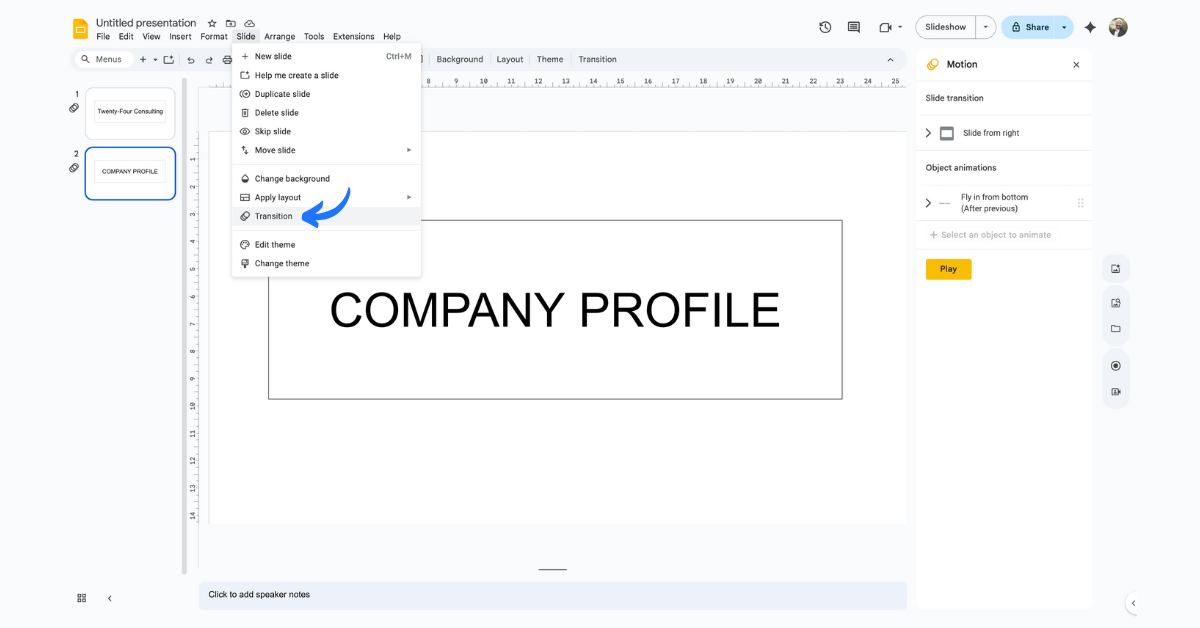
Step 2: Add the Transition
- Look for Slide in the top menu
- Click Change transition
- Choose from the available transition effects
Quick Tips for Better Presentations
- Less is more: Don’t animate everything – it can become distracting
- Keep it consistent: Use similar animation styles throughout your presentation
- Test before presenting: Always preview your animations to make sure they work smoothly
- Consider your audience: Subtle animations work better for professional settings
- Time it right: Make sure animations aren’t too slow (boring) or too fast (jarring)
Troubleshooting
Animation not working?
- Make sure you’ve selected the right object before adding the animation
- Try using a different web browser if animations aren’t displaying properly
Want to remove an animation?
To remove animations from a single slide:
- Open your presentation in Google Slides.
- Select the slide you want to modify.
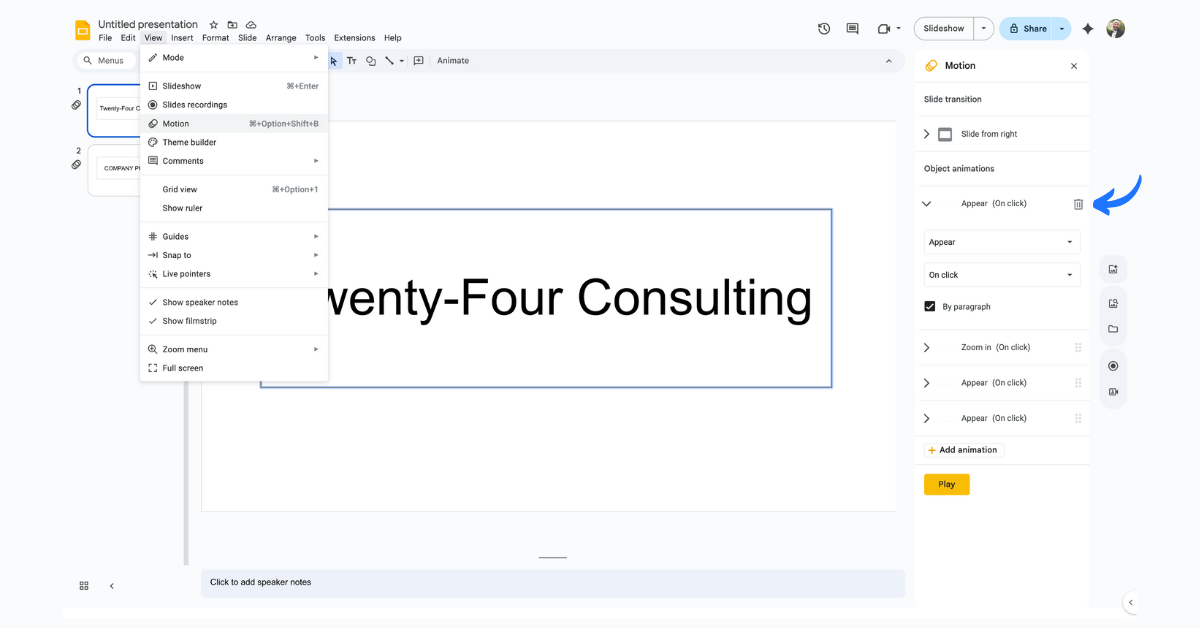
- Go to the View menu and select Motion. This will open the Motion panel on the right.
- In the Motion panel, you will see a list of all the object animations on the slide.
- Click the trash can icon next to the animation you wish to remove. Repeat this for all animations you want to delete from the slide.

By Nur Ain Wahida
Customer Success Manager @ Twenty-Four Consulting
By Nur Ain Wahida
Customer Success Manager @ Twenty-Four Consulting

Related Posts