This automation trick may actually change your life.
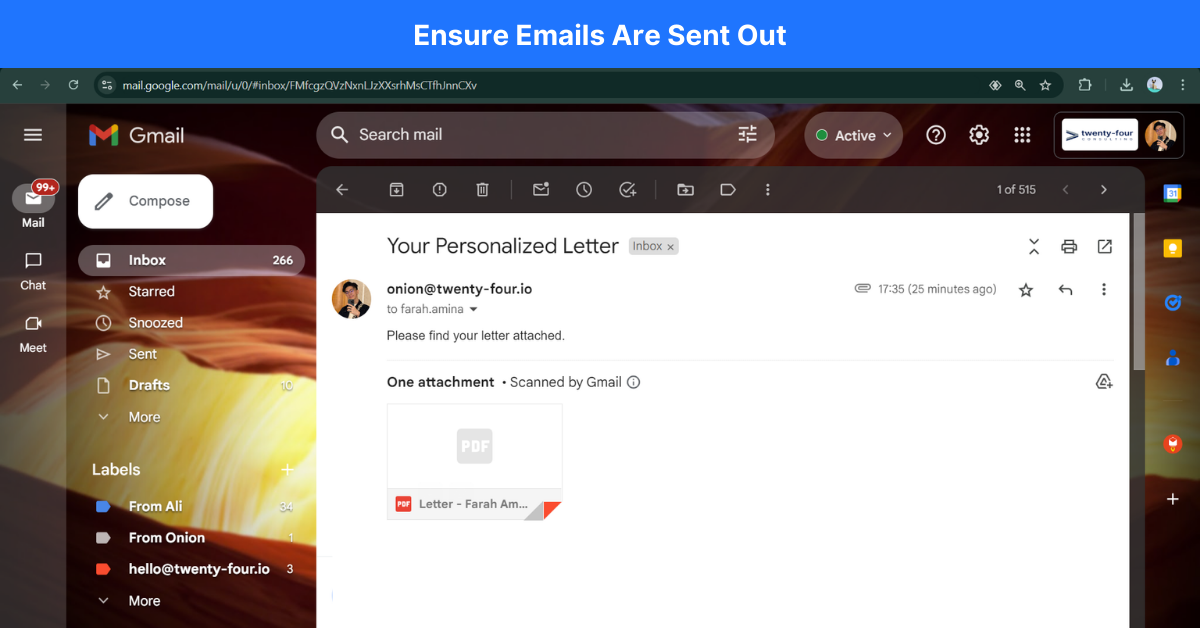
Before we dive into the technical details, imagine something powerful: automating the creation of personalised letters for hundreds of people—generating each letter, converting them to PDFs, emailing them, and even tracking their status—all with just one click. This is exactly what this solution offers.
But that’s not where it ends. Once you understand how this automation works, you can apply it to much more than letters. Think about automating invoices, contracts, certificates, event invitations, or any repetitive task that involves merging data and documents. The potential to save time and reduce manual effort is enormous. Automate reports, schedule follow-ups, or generate custom documents on demand for your team—whatever fits your needs.
The real power of automation lies in its flexibility. Using tools like Google Apps Script and ChatGPT, you can build custom workflows tailored specifically to your tasks—without needing to be a coder. By the end of this tutorial, you’ll have the knowledge to automate key workflows, freeing up your time to focus on more important work.
So, let’s get started and explore how you can unlock the full potential of automation!
The workflow
Step 1: Getting your assets ready
Before you start getting the codes, prepare the 3 assets that you need.
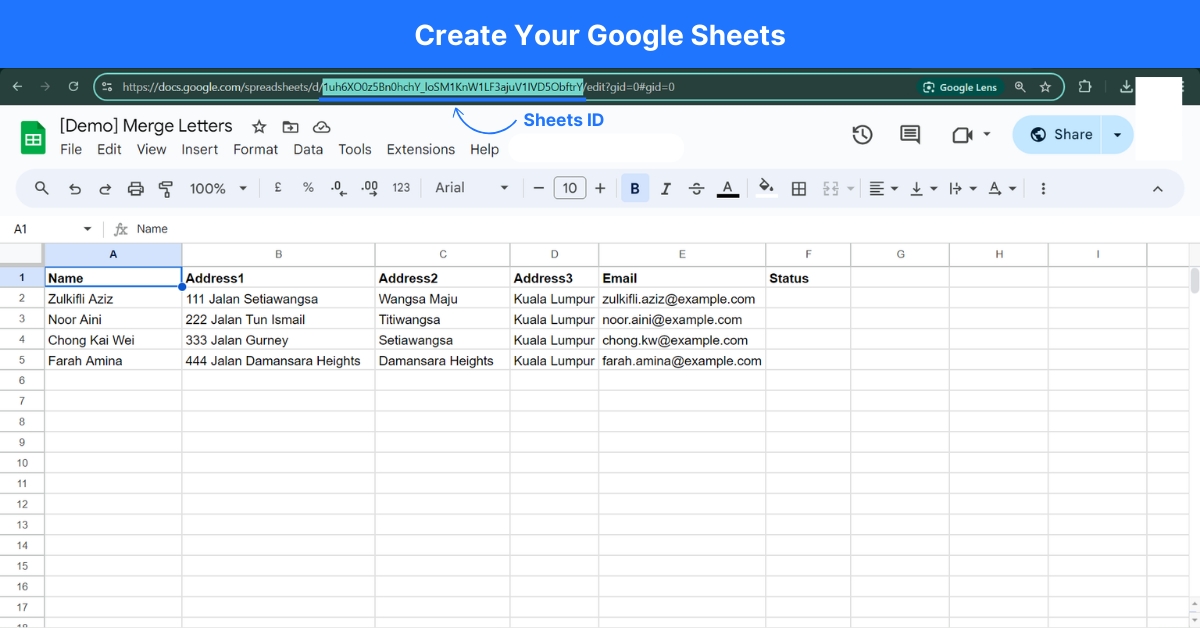
1. Google Sheets – the file containing names and email addresses
- Create a new Google Sheets (**called ‘Merge Letters’) and name the columns of data that you want to display in the custom letter, add a column called ‘Status’ at the end so that we see confirmation that the letter has been sent out. Eg, ‘Name’, ‘Address1’, ‘Address2’, ‘Email’, ‘Status’
- The spreadsheet can contain an almost unlimited number of columns and data that you can ‘push’ into a Google Docs to create personalised letters.
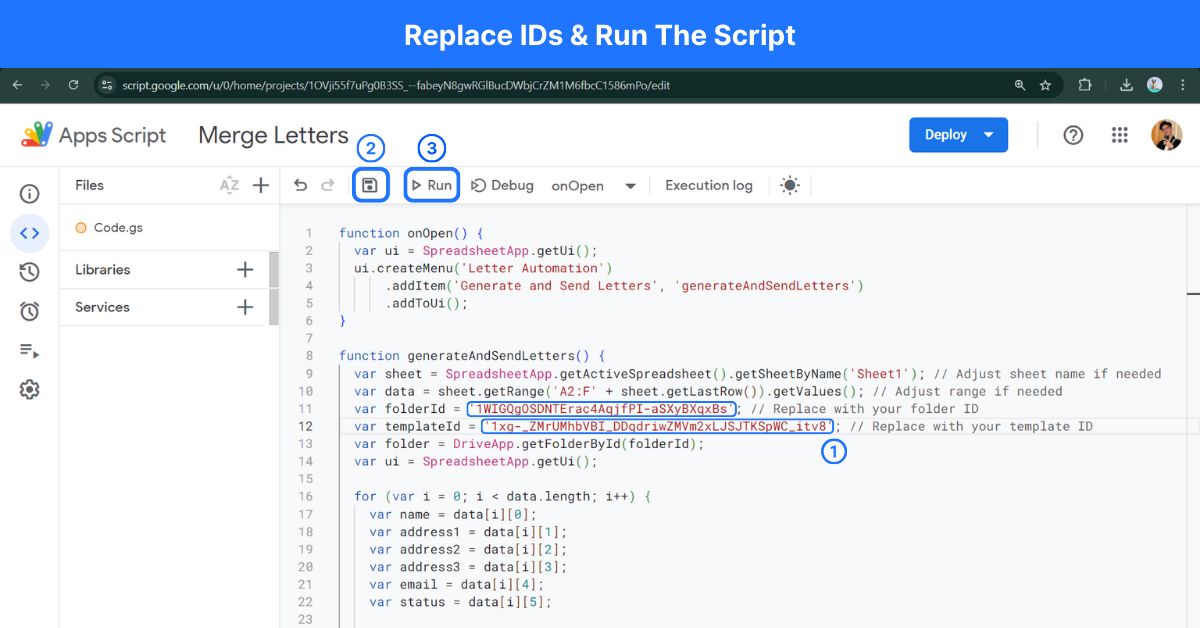
- Take note of the Sheets file ID in the URL bar. ID is written in blue for example: https://docs.google.com/spreadsheets/d/1uh6XO0z5Bn0hchY_loSM1KnW1LF3ajuV1IVD5ObftrY/edit?usp=sharing
2. Google Docs – the letter template
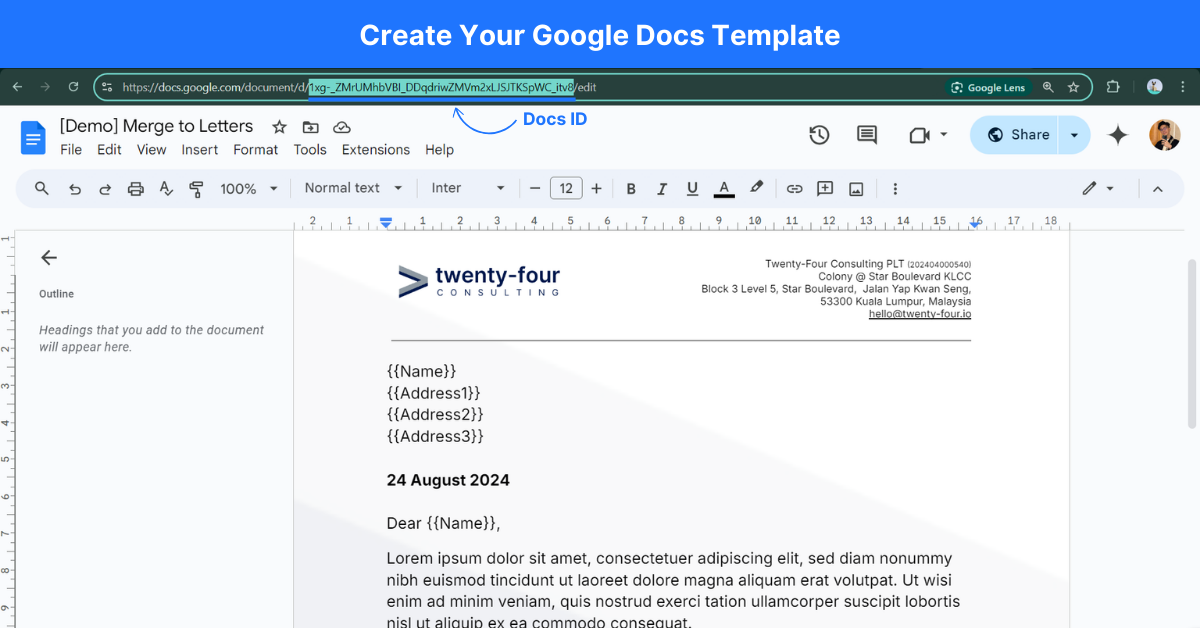
- Create a new Docs file (**called 'Letter Template') and draft out the letter to be sent out to the respondents.
- Where you want to pull the data from the spreadsheet and insert into a line, use the curly braces to define the placeholders.
- Example: , ,
- Ensure that the capitalization of the placeholders match the ones in your spreadsheet.
- Take note of the Docs file ID in the URL bar. ID is written in blue for example: https://docs.google.com/document/d/1xg-_ZMrUMhbVBI_DDqdriwZMVm2xLJSJTKSpWC_itv8/edit?usp=sharing
3. Google Drive – where the letters are stored
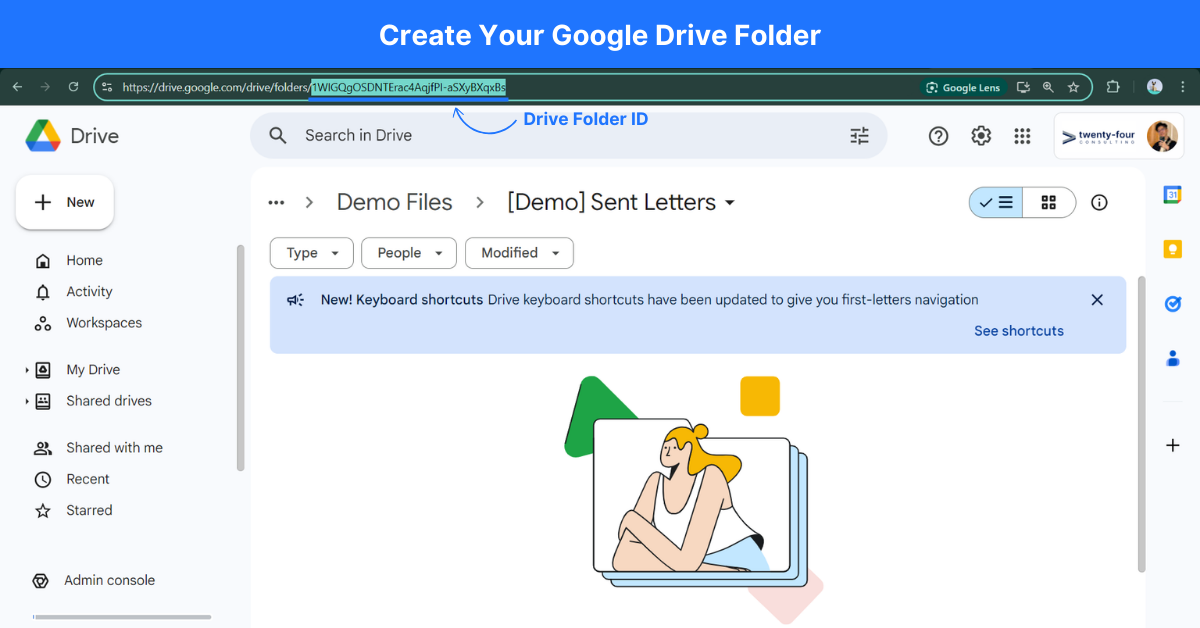
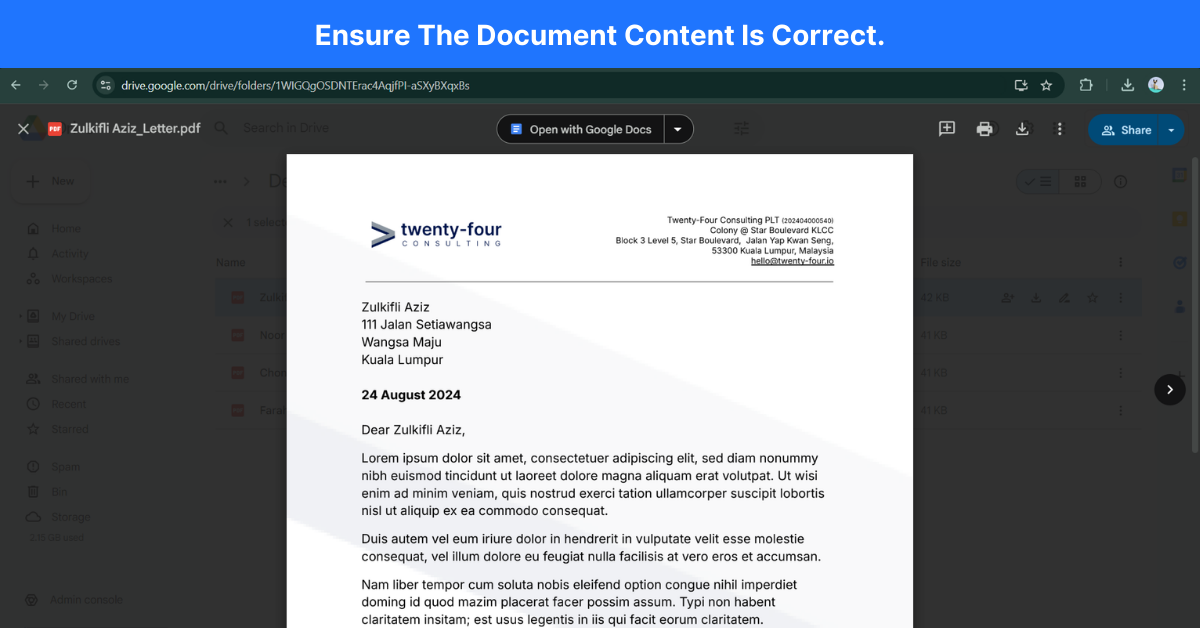
- Create a new folder (**called ‘Sent Letters’) that will save the PDFs of the letters that have been personalised and sent out.
- Take note of the folder ID in the URL bar. ID is written in blue for example: https://drive.google.com/drive/folders/1WIGQgOSDNTErac4AqjfPI-aSXyBXqxBs
**File and folder names can be anything you want them to be. Do the next step only when you completed the above steps.
Step 2: ChatGPT – getting the code and executing it
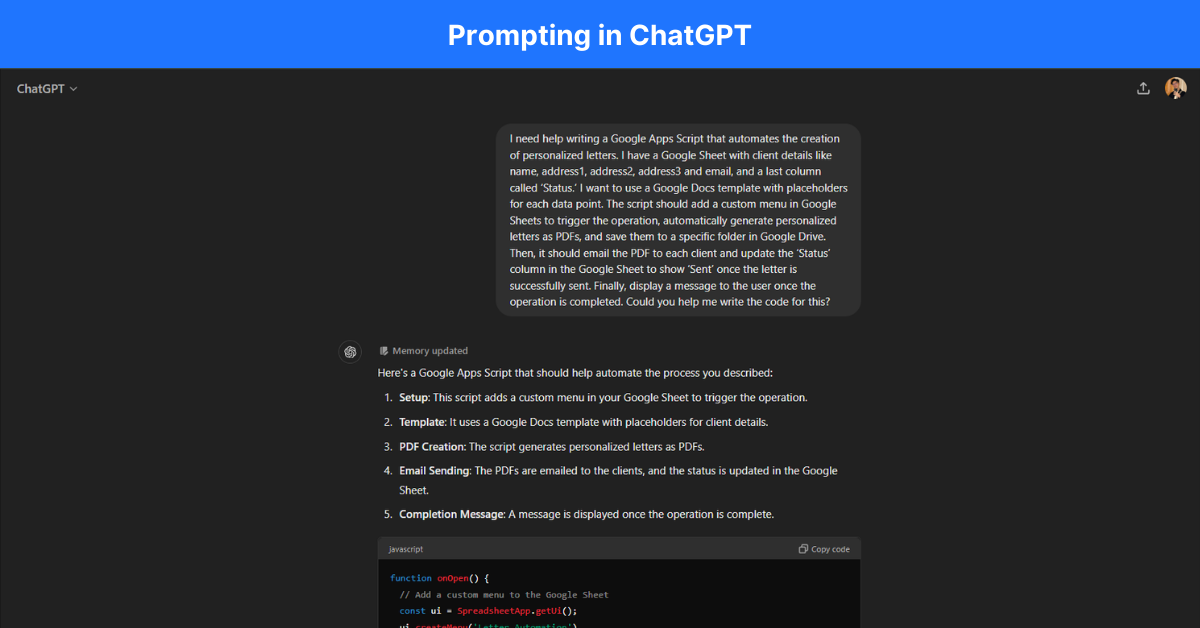
1. Prompting in ChatGPT (Important)
-
The first step is to enter the following prompt into ChatGPT (https://chatgpt.com/):
- If your code didn’t work, try to edit the prompt to make it more specific that matches your scenario, or you can simply copy the code from out ChatGPT conversation here—https://chatgpt.com/share/32a26f41-6705-4650-a479-175db666cb33
This is just an example prompt—you don’t need to copy it exactly. Feel free to adjust the wording to better fit your situation/scenario.
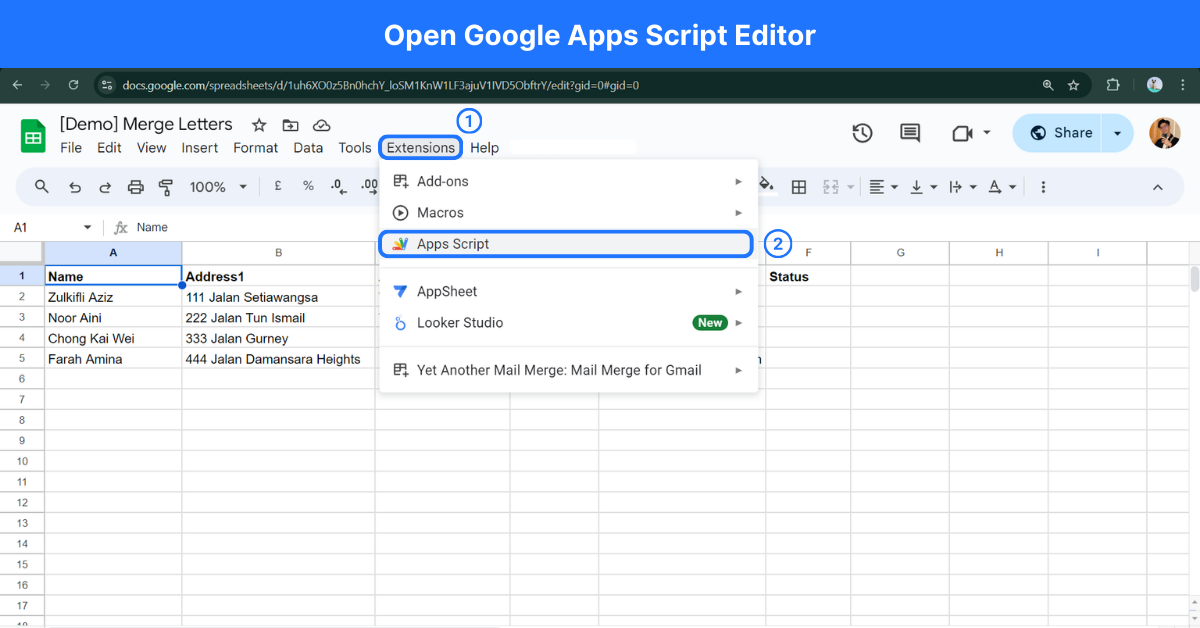
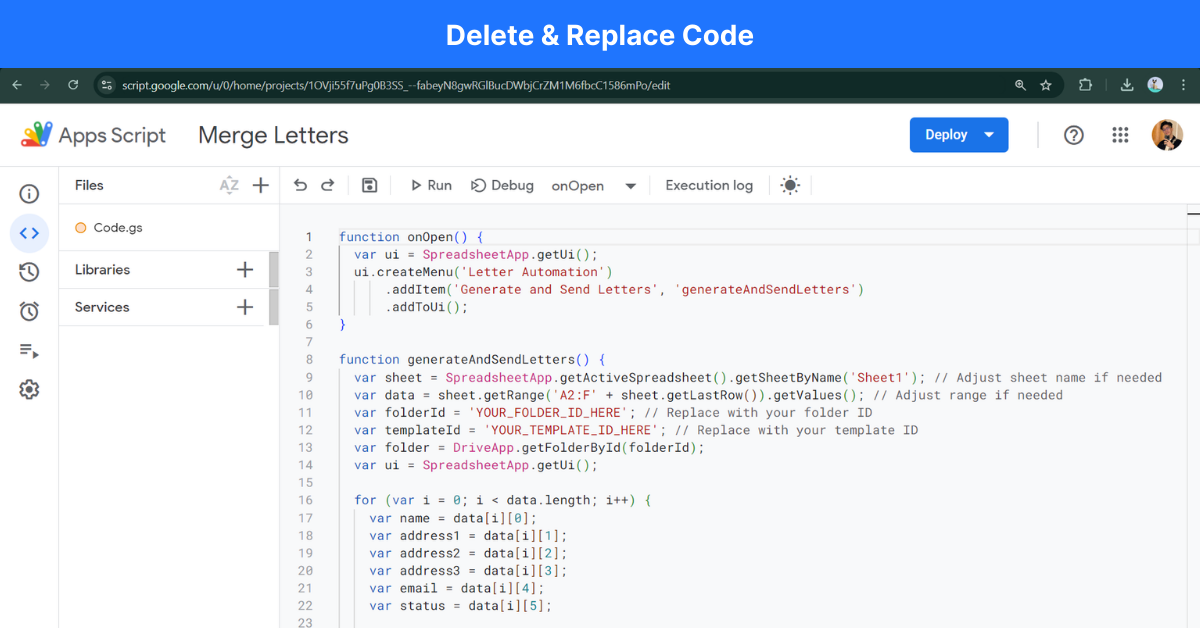
2. Examine ChatGPT’s Output for Instructions
- The second step is to examine the output displayed by ChatGPT, it should contain instructions on how to execute the code in Google Apps Script.
Note: you will never get the same output even with using the same prompt, this is just the nature of using Gen AI tools. It should be fine, but if you run into problems, simply re-prompt and try again.
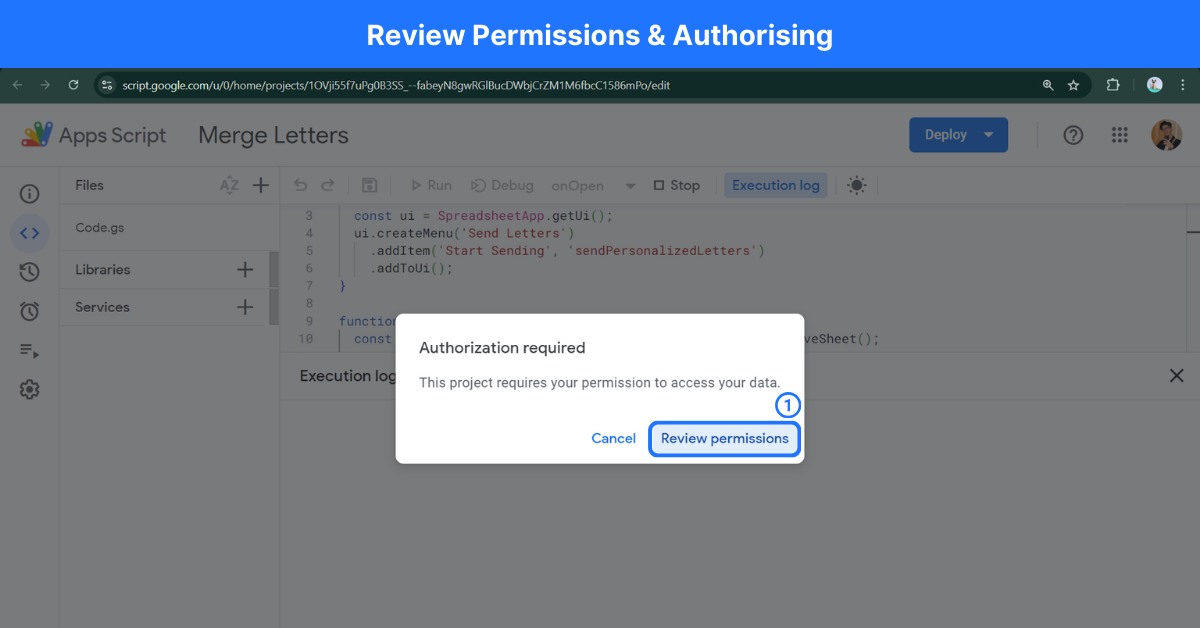
6. Review Permissions & Authorising
Allow permissions for Google Apps Script to run & execute, follow the steps below.
- Click “OK” or “Review Permission” when you see “Authorisation Required”
- Select your Google Account
- When you see “Google hasn’t verified this app”, click on “Advanced” on the bottom left, click on the “(unsafe)” option. *If you don’t see this option, just proceed & select allow.
- Then select “Allow” at the last section
- Note: Running the script is completely safe when you are running it on your own account, have a second thought when you are allowing others to access your files.
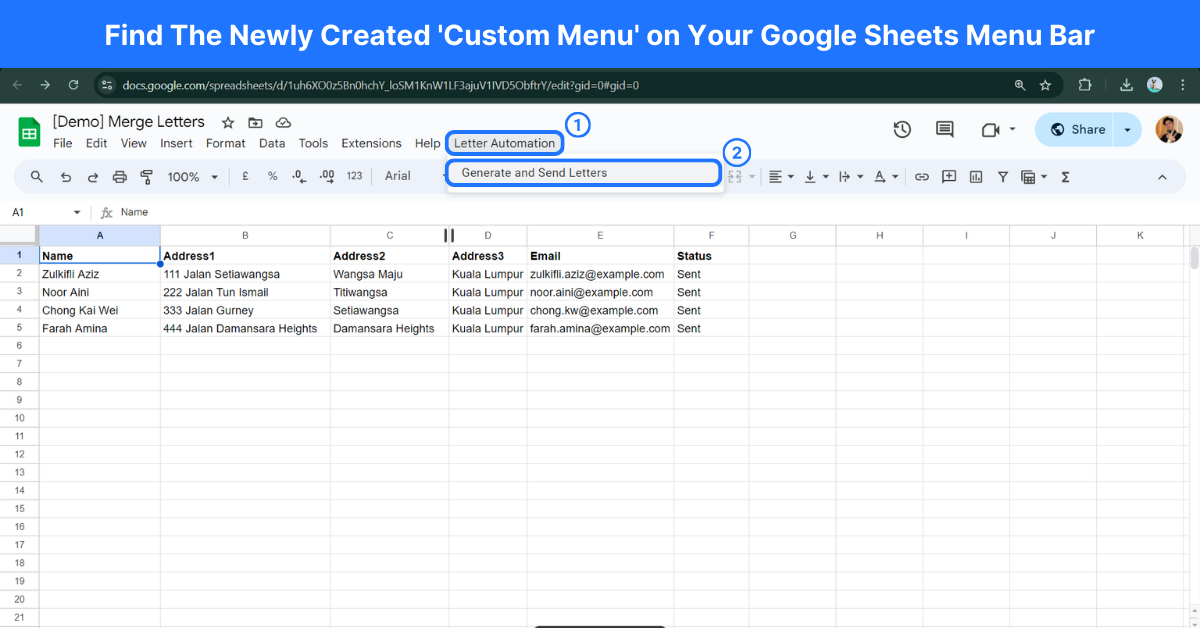
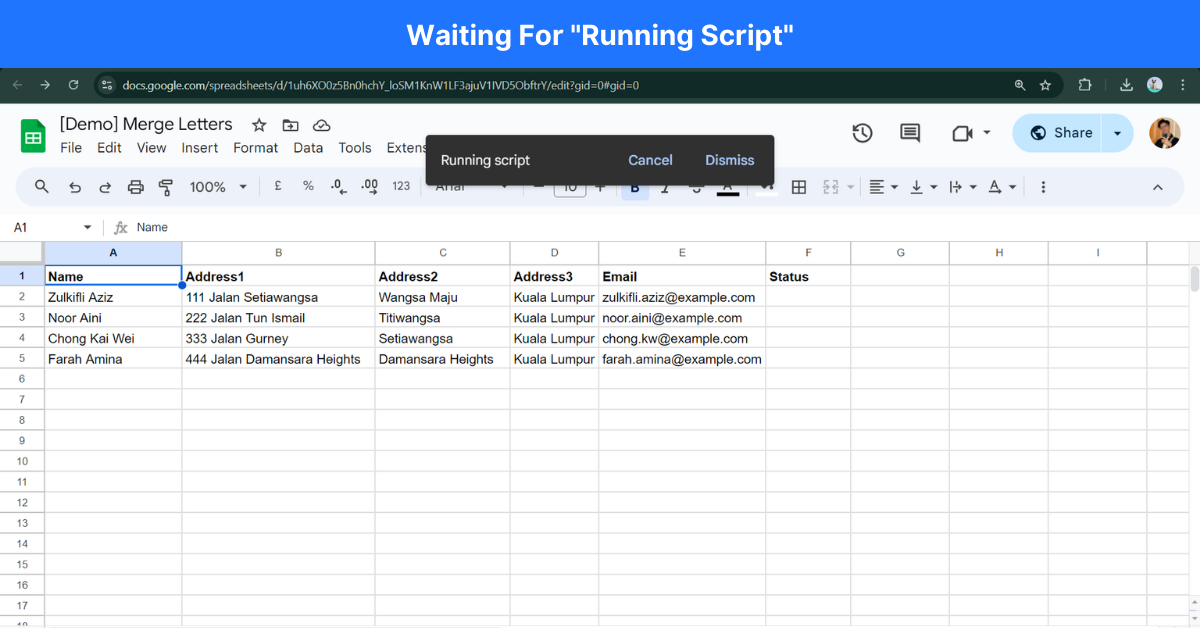
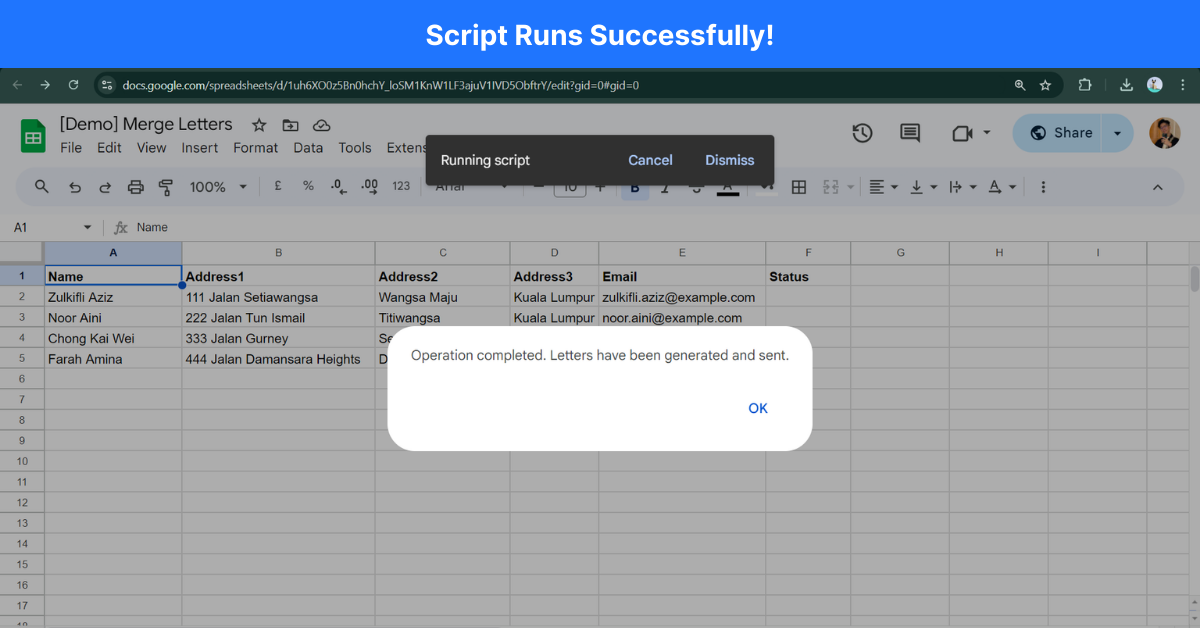
- Look at the image below to have a better idea of the entire authorisation process.
If you have reached here, congratulations!
Troubleshooting
- If the placeholder does not display the data, check the placeholders spelling in both the spreadsheet and Google Docs file.
- If you receive any errors when running the script, copy and paste the error code into ChatGPT.
- If you find yourself troubleshooting too long, start again from the beginning.
Conclusion
So, did you successfully deploy the code? Pretty easy, right? It’s amazing to think that you just went through this entire process without spending anything and without needing to know how to code—all by simply prompting a Gen AI tool. Technology has truly come a long way.
Now, take a moment to think about how you can apply this skill in your daily work. Whether it’s automating the creation of certificates, generating personalized letters, or streamlining other repetitive tasks, there are endless possibilities.
Consider your current workflow—where could automation save you time and effort? How can you use this newfound skill to make your work more efficient and impactful? Start brainstorming ideas, and who knows, you might find new ways to optimize your day-to-day tasks.
By Ali Reza Azmi
Founder & Consultant @ Twenty-Four Consulting
By Ali Reza Azmi
Founder & Consultant @ Twenty-Four Consulting
Related Posts

